N_

For all those lodash <3'rs out there, here is a sleek node module that lets you to start your REPL with Lo-Dash required by default.

n_ is that cli app which does this job for you, it makes use a the repl module and injects lodash into the context.

If you notice in the node REPL, _ contains the result of the last expression.

1
2
3
4
5
> 3 + 4

> _ + 1

> 8

As this modules loads Lo-Dash to _ it redirects REPL changes of _ the new special variable $

Install this module globally: npm install -g n_

Sample usage:

1
$ n_ # This would start the node REPL with Lo-Dash loaded.
1
2
3
4
5
n_ > _.VERSION
'2.4.1'

n_> _.shuffle([1,2,3,4])
[ 2, 1, 4, 3 ]
1
2
3
4
5
6
7
8
9
10
11
12
13
14
15
16
17
18
19
20
21
22
23
24
25
26
27
28
29
30
31
32
33
34
35
36
37
38
39
40
41
42
43
44
45
46
47
48
49
50
51
52
53
54
55
56
57
58
59
60
61
62
63
64
65
66
67
68
69
70
71
72
73
74
75
76
77
78
79
80
81
82
83
84
85
86
87
88
89
90
91
92
93
94
95
96
97
98
99
100
101
102
103
104
105
106
107
108
109
110
111
112
113
114
115
116
117
118
119
120
121
122
123
124
125
126
127
128
129
130
131
132
133
134
135
136
137
138
139
140
141
142
143
144
145
146
n_ > _.keys(_)
[ 'support',
  'templateSettings',
  'after',
  'assign',
  'at',
  'bind',
  'bindAll',
  'bindKey',
  'chain',
  'compact',
  'compose',
  'constant',
  'countBy',
  'create',
  'createCallback',
  'curry',
  'debounce',
  'defaults',
  'defer',
  'delay',
  'difference',
  'filter',
  'flatten',
  'forEach',
  'forEachRight',
  'forIn',
  'forInRight',
  'forOwn',
  'forOwnRight',
  'functions',
  'groupBy',
  'indexBy',
  'initial',
  'intersection',
  'invert',
  'invoke',
  'keys',
  'map',
  'mapValues',
  'max',
  'memoize',
  'merge',
  'min',
  'omit',
  'once',
  'pairs',
  'partial',
  'partialRight',
  'pick',
  'pluck',
  'property',
  'pull',
  'range',
  'reject',
  'remove',
  'rest',
  'shuffle',
  'sortBy',
  'tap',
  'throttle',
  'times',
  'toArray',
  'transform',
  'union',
  'uniq',
  'values',
  'where',
  'without',
  'wrap',
  'xor',
  'zip',
  'zipObject',
  'collect',
  'drop',
  'each',
  'eachRight',
  'extend',
  'methods',
  'object',
  'select',
  'tail',
  'unique',
  'unzip',
  'clone',
  'cloneDeep',
  'contains',
  'escape',
  'every',
  'find',
  'findIndex',
  'findKey',
  'findLast',
  'findLastIndex',
  'findLastKey',
  'has',
  'identity',
  'indexOf',
  'isArguments',
  'isArray',
  'isBoolean',
  'isDate',
  'isElement',
  'isEmpty',
  'isEqual',
  'isFinite',
  'isFunction',
  'isNaN',
  'isNull',
  'isNumber',
  'isObject',
  'isPlainObject',
  'isRegExp',
  'isString',
  'isUndefined',
  'lastIndexOf',
  'mixin',
  'noConflict',
  'noop',
  'now',
  'parseInt',
  'random',
  'reduce',
  'reduceRight',
  'result',
  'runInContext',
  'size',
  'some',
  'sortedIndex',
  'template',
  'unescape',
  'uniqueId',
  'all',
  'any',
  'detect',
  'findWhere',
  'foldl',
  'foldr',
  'include',
  'inject',
  'first',
  'last',
  'sample',
  'take',
  'head',
  'VERSION' ]

GIF FTW!

n_

Thanks to Boris Diakur for publishing this module!
Mongoskin

mongoskin

The future layer above node-mongodb-native.

mongoskin -> The promise wrapper for node-mongodb-native, makes life easier by helping us to work easily with mongodb, but how?

Check this out!

Install it like any other module: $ npm install mongoskin

With mongoskin you can dburl like mongodb://localhost:27017/test or use Replset :

1
2
3
4
5
var replSet = new ReplSetServers([
        new Server('localhost', 30000),
        new Server('localhost', 30001),
        new Server('localhost', 30002),
]);

Where Server is require('mongoskin').Server

Example usage of data insertion:

1
2
3
4
5
6
7
8
9
10
var mongo = require('mongoskin');

db = mongo.db('mongodb://localhost/test');

db.collection('test').insert({foo: 'bar'}, function(err, result) {
    console.log(result);
    db.collection('test').drop();
    db.close();

});

It has an extensive API with sleeker syntax compared with native.

Thanks to kissjs team, specially to Gui Lin

Mute-stream

Bytes go in, but they don't come out (when muted).

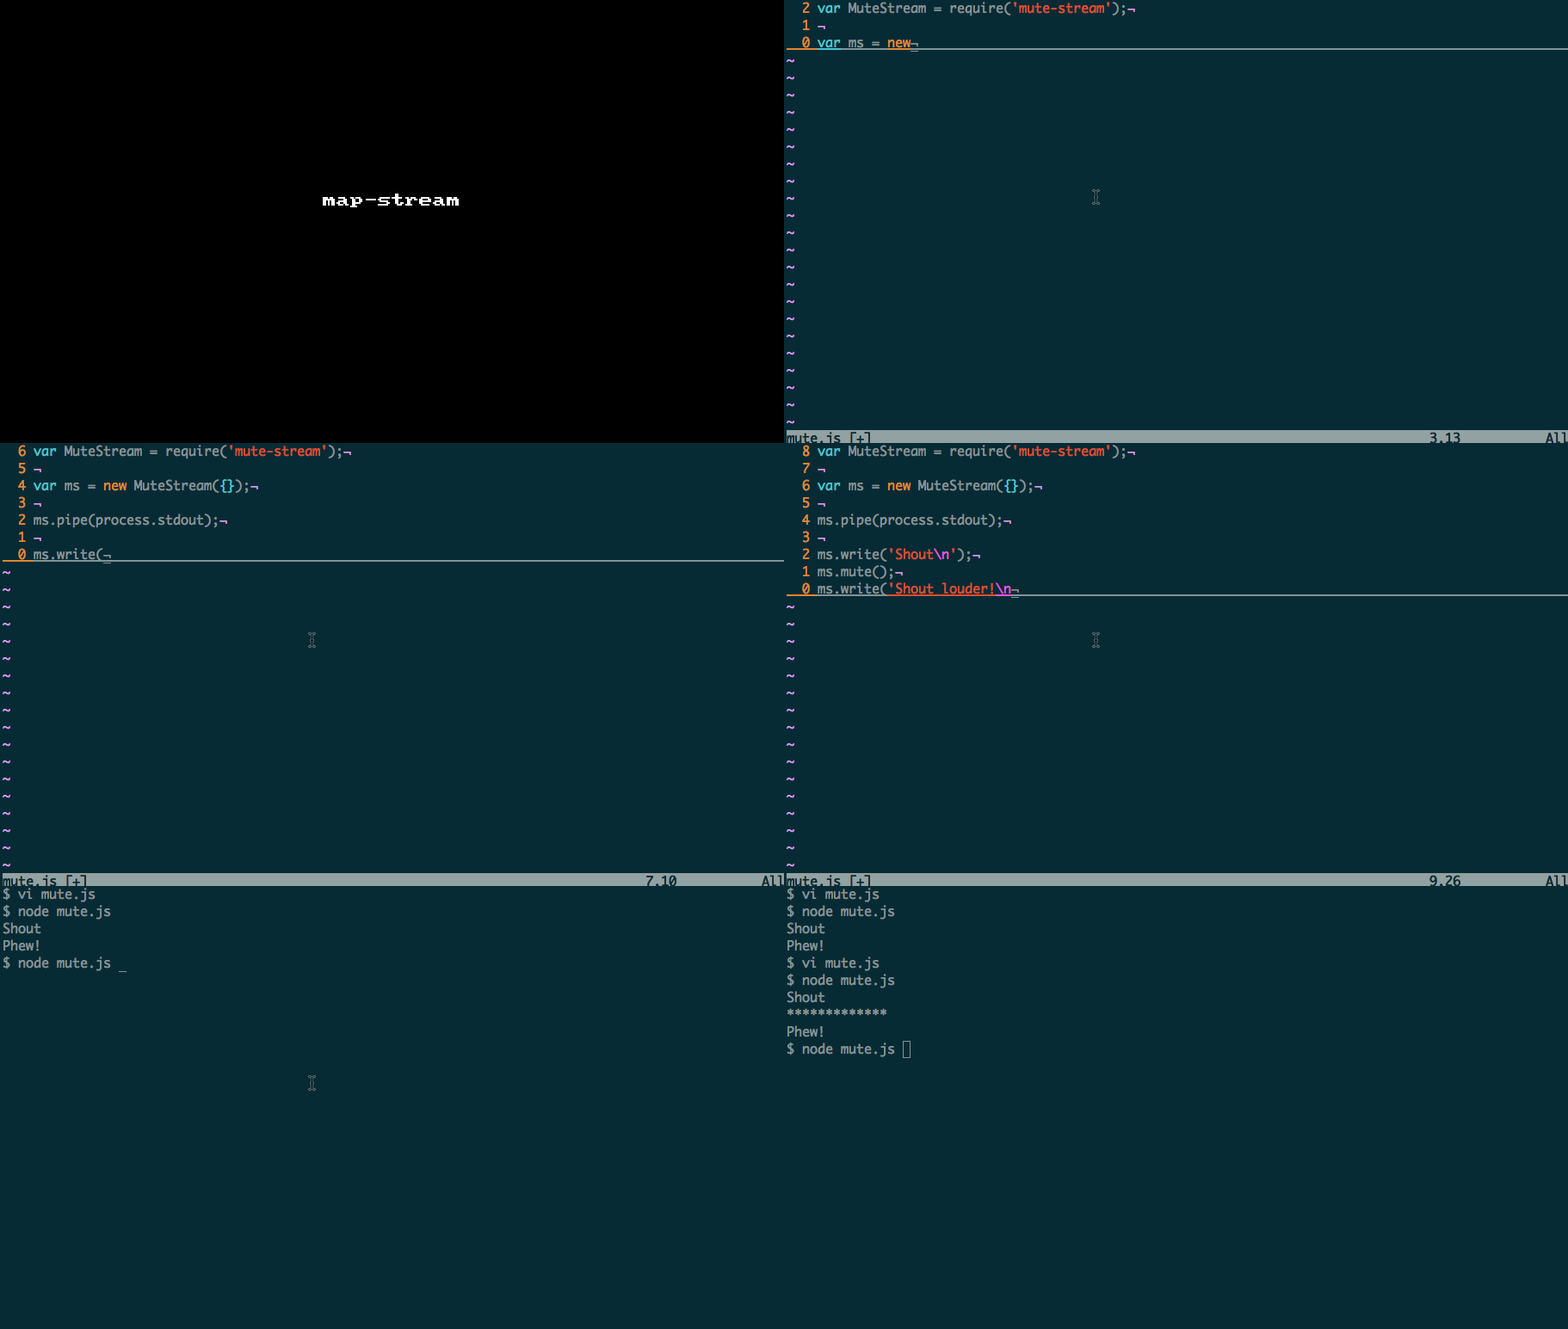
mute-stream as the name says it mutes the stream, as in it's a pass-through stream, but when muted, the bytes are silently dropped, rather than being passed through.

Installing it: npm install mute-stream

Example usage:

1
2
3
4
5
6
7
8
9
var ms = new (require('mute-stream'))({});

ms.pipe(process.stdout);

ms.write('Shout\n');
ms.mute();
ms.write('Shout louder!\n');
ms.unmute();
ms.write('Phew!\n');

({}) is the options part, that can be either of:

  • replace => Replaces the muted string with the specified string. (Check the gif)

  • prompt => prompt with a readline stream, to avoid backspace overwrites.

It also provides ms.muted() method to check if the stream is already muted.

The MuteStream object acts as a facade to its pipe source and destination.

GIF FTW!

Thanks to Isaac Z. Schlueter for helping us to mute the noise! ;)

Boom

How often do we visit the list of HTTP status code to check or to inform the user about the status of the request? Well you might remember most of them, but would it not be cool to have more humanized mechanism to handle this?

Well here is BOOM HTTP-friendly error objects, as the name suggest it's make the error reporting more friendly.

Installing it is like any other node module: npm install boom

It provides the below error messages:

1
2
3
4
5
6
7
8
9
10
11
12
13
14
15
16
17
18
19
20
21
22
23
24
25
[
  'badRequest',
  'unauthorized',
  'forbidden',
  'notFound',
  'methodNotAllowed',
  'notAcceptable',
  'proxyAuthRequired',
  'clientTimeout',
  'conflict',
  'resourceGone',
  'lengthRequired',
  'preconditionFailed',
  'entityTooLarge',
  'uriTooLong',
  'unsupportedMediaType',
  'rangeNotSatisfiable',
  'expectationFailed',
  'internal',
  'notImplemented',
  'badGateway',
  'serverTimeout',
  'gatewayTimeout',
  'badImplementation'
 ]

Sample usage:

1
2
3
4
5
6
7
8
9
10
11
12
13
14
15
16
17
18
19
20
21
22
23
> var boom = require('boom');

> var notFound = boom.notFound("Sorry, it's not here :(")

> notFound

{ [Error: Sorry, it's not here :(]
  data: null,
  isBoom: true,
  output: 
   { statusCode: 404,
     payload: 
      { statusCode: 404,
        error: 'Not Found',
        message: 'Sorry, it\'s not here :(' },
     headers: {} },
  reformat: [Function] }

> notFound.output.payload

{ statusCode: 404,
  error: 'Not Found',
  message: 'Sorry, it\'s not here :(' }

GIF FTW

Thanks to @WalmartLabs team for this module, specially for the maintainers Eran Hammer and Wyatt Preul

PSI

If you are into web development at one point or the other you would have used Google's pagespeed insights to improve the performance of your site.

Now it's even easier to get those insights on your CLI with psi thanks to the Addy Osmani for such a wonderful module.

Formal defination of the module:

PageSpeed Insights With Reporting

Run mobile and desktop performance tests for your deployed site using Google PageSpeed Insights with tidy reporting for your build process. A sample Gulpfile demonstrating use is also available.

Uses gpagespeed and the reporter in grunt-pagespeed.

Install it -> $ npm install psi

Example usage:

P.S: Registering for an API key from the Google Developer Console is recommended.

In code:

1
2
3
4
5
6
7
8
9
10
var psi = require('psi');

psi({
  // key: '...', optional
  url: 'http://nmotw.in',
  paths: '',           // optional
  locale: 'en_US',     // optional
  strategy: 'mobile',  // optional
  threshold: 80        // optional
});

On CLI:

1
2
3
4
5
6
7
8
9
10
11
12
13
14
15
16
17
18
19
20
21
22
23
24
25
26
27
28
29
30
31
32
33
34
35
36
37
38
$ psi http://nmotw.in --strategy desktop
Running Pagespeed Insights
Pagespeed Insights: Processing results

----------------------------------------------------------------

URL:      http://nmotw.in/
Strategy: desktop
Score:    90

----------------------------------------------------------------

Number Resources                                 | 16
Number Hosts                                     | 7
Total Request Bytes                              | 1538
Number Static Resources                          | 8
Html Response Bytes                              | 7019
Css Response Bytes                               | 17484
Image Response Bytes                             | 384
Javascript Response Bytes                        | 228348
Other Response Bytes                             | 221982
Number Js Resources                              | 5
Number Css Resources                             | 3

----------------------------------------------------------------

Avoid Landing Page Redirects                     | 0
Enable Gzip Compression                          | 0
Leverage Browser Caching                         | 1.5
Main Resource Server Response Time               | 0
Minify Css                                       | 0
Minify HTML                                      | 0
Minify Java Script                               | 0.16
Minimize Render Blocking Resources               | 8
Optimize Images                                  | 0
Prioritize Visible Content                       | 0

----------------------------------------------------------------

If you have bunch of sites to analyse you could something like:

1
cat links | xargs -L1 psi > analysis.report

GIF FTW!

psi

Proxyquire

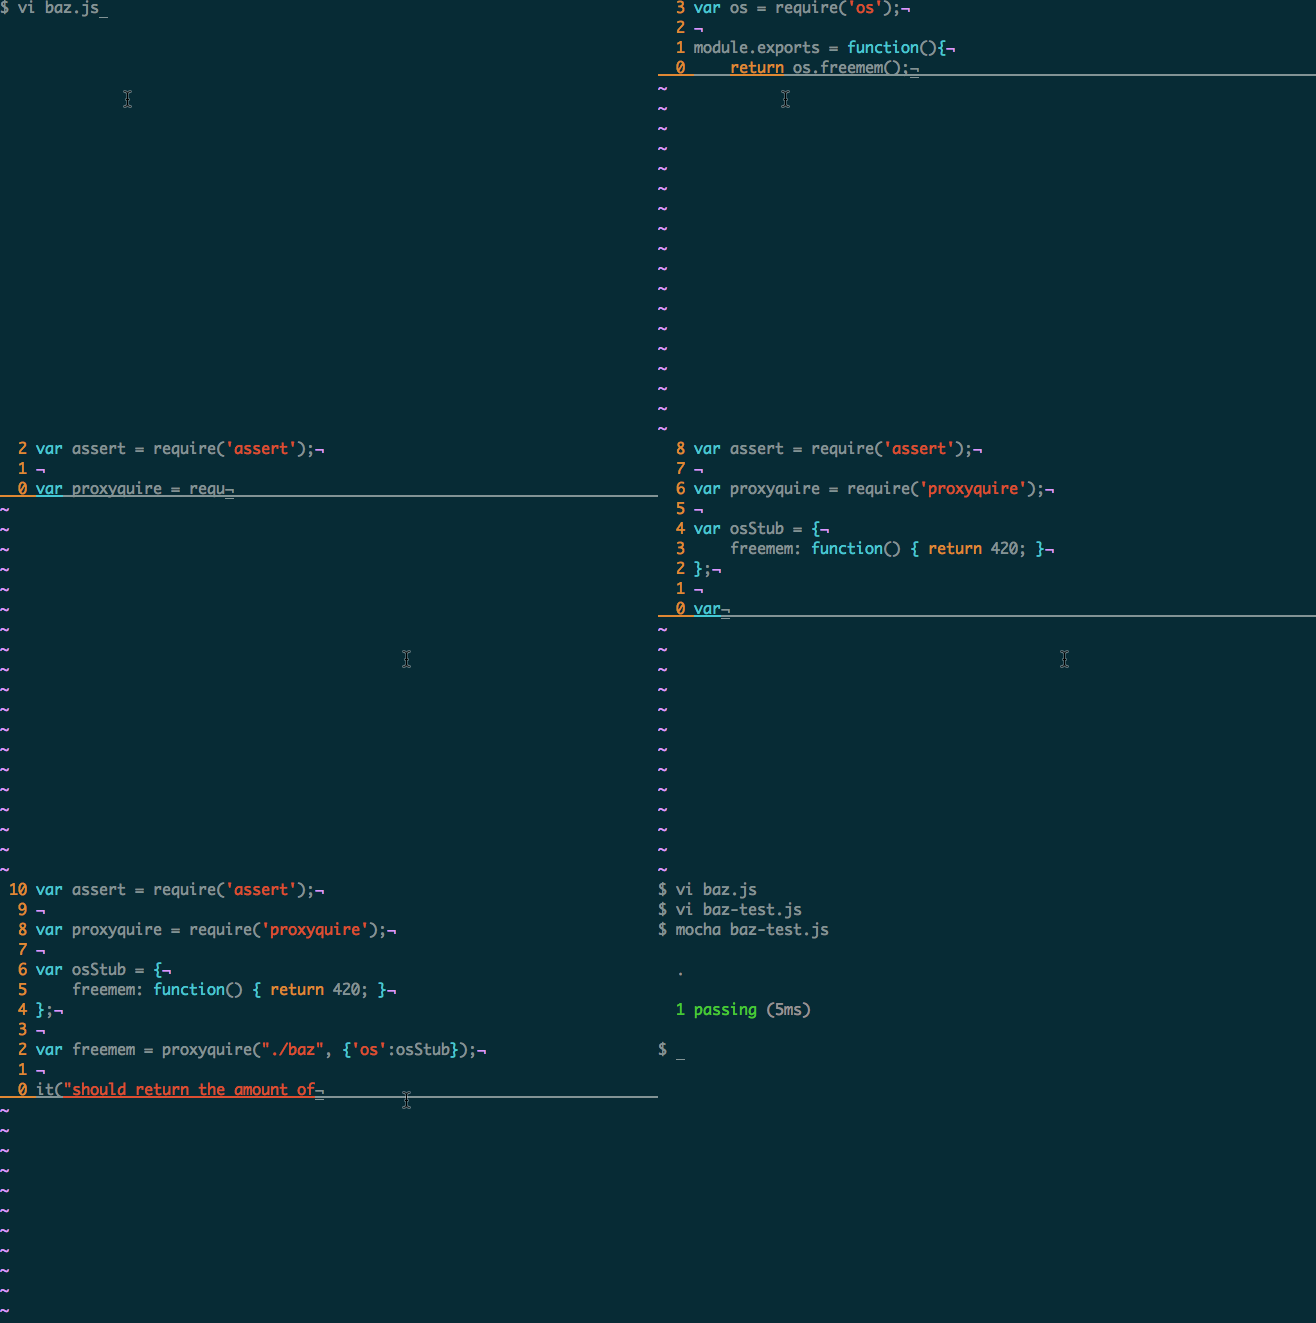
Test cases always involves mocks and stub, sometimes there will be a need to mock require itself, that where proxyquire comes for our rescue.

Proxyquire: Proxies nodejs require in order to allow overriding dependencies during testing.

Installing proxyquire: npm install -D proxyquire

Example:

Say we a file baz.js under test and it looks like:

1
2
3
4
5
var os = require('os');

module.exports = function() {
  return os.freemem();
}

It's evident that the return value of this function will never be a constant value.

How do we test it then?

Have a look at the test case:

1
2
3
4
5
6
7
8
9
10
11
12
13
14
15
16
17
// Get some assertion helper.
var assert = require('assert');

// First up we require proxyquire
var proxyquire = require('proxyquire');

// We make a mock of what we need.
var osStub = {
  freemem: function() { return 617619456; }
}

// Now some magic ;)
var freemem = proxyquire("./baz",{'os':osStub});

it("should return the amount of free memory", function(){
    assert.equal(freemem(),6176197456);
});

That's it! The test case will be green now :)

Proxyquire basically, replaces a module's require function.

There are many other features like:

  • 'noCallThru',
  • 'callThru',
  • 'noPreserveCache',
  • 'preserveCache',
  • 'load'

Please feel free to go through their extensive API DOC

GIF FTW!

/images/proxyquire

Kudos to Thorsten Lorenz for the wonderful module.

Music Meta Data

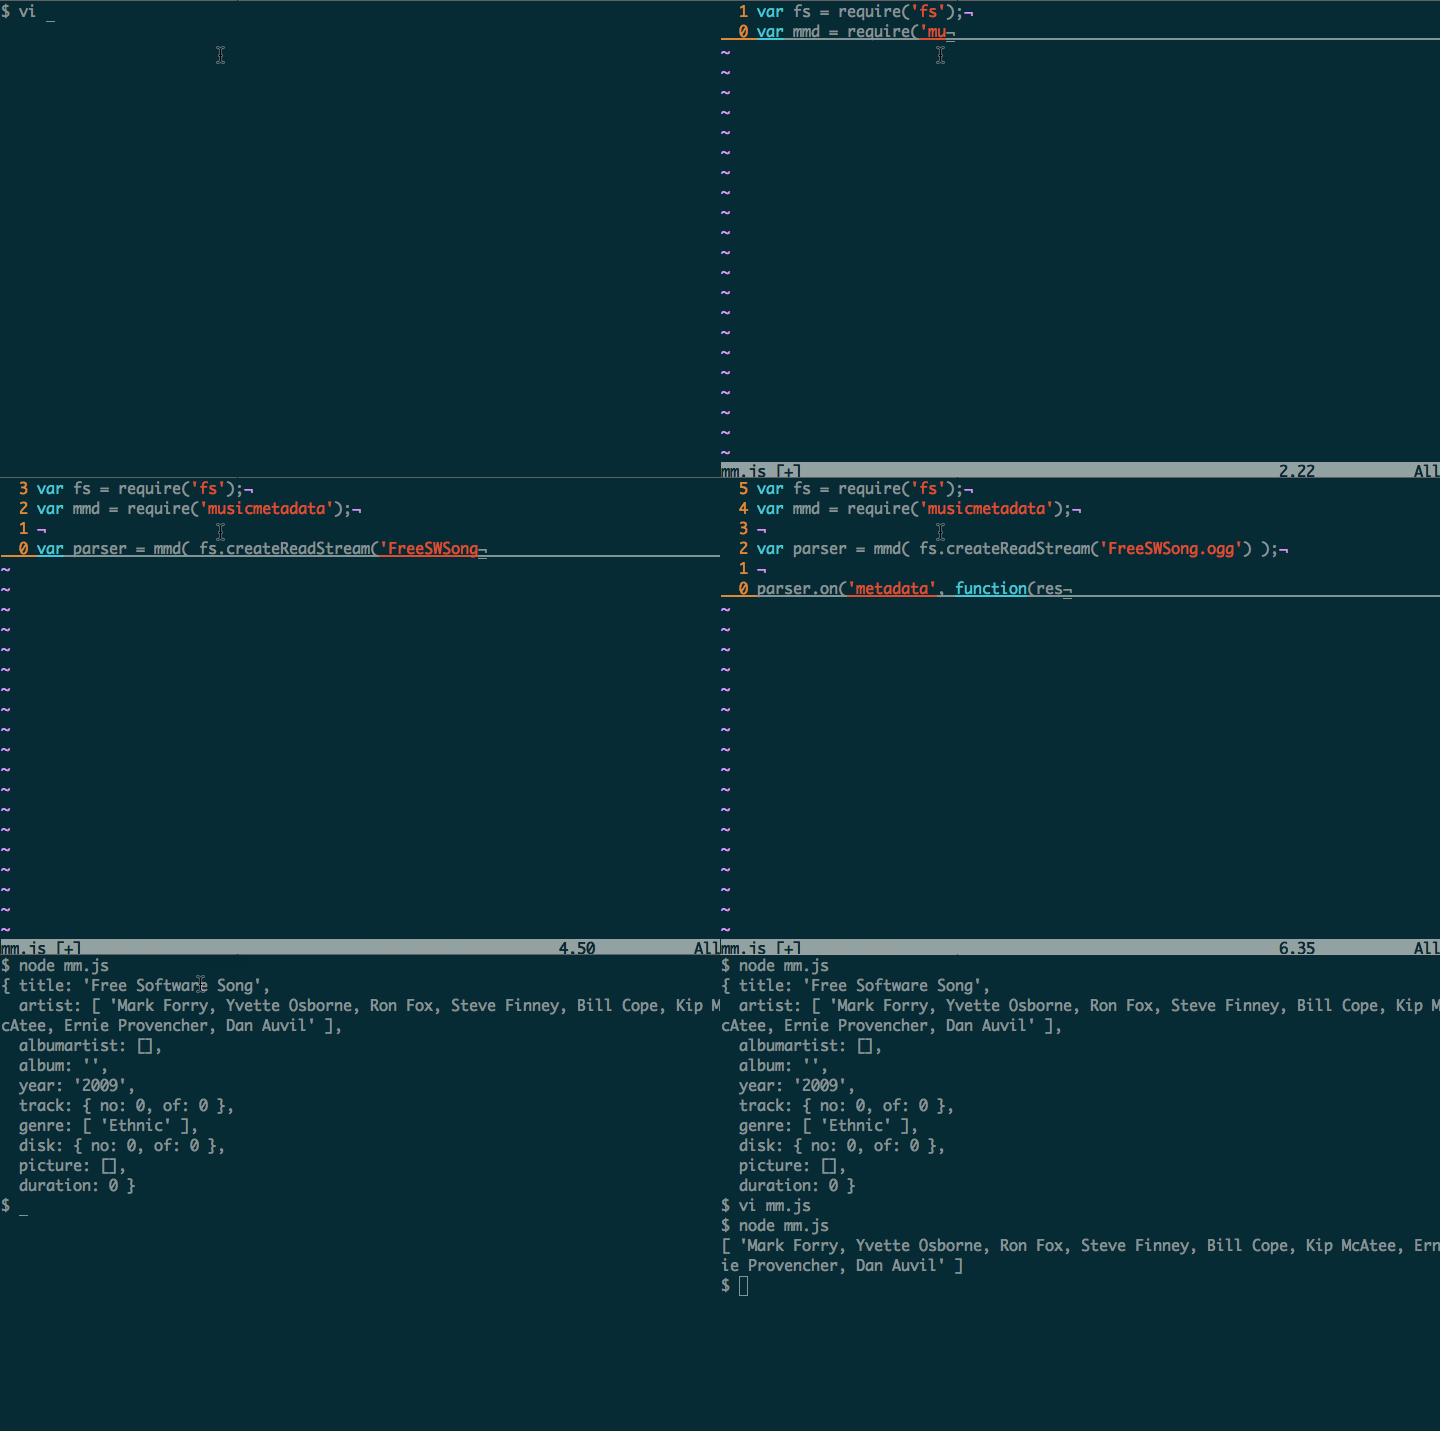
musicmetadata is a streaming music metadata parser for node and the browser, but out focus is more on node side here.

It's worth noting that this module is influnced by node-id3

This module makes it easier to extra meta data from a given audio file, it supports:

  • mp{1.1, 2.2, 2.3, 2.4, 3}
  • m4a, mp4.
  • vorbis (ogg, flac)
  • asf (wma, wmv)

It parses the files for meaning fully meta data, for example it maintaines a common list of GENRES and pic types that will be matched and extracted from the Meta Data Atom.

But the clean part of this module is it makes use of Streams :-)

Kudos to Lee Treveil on this.

Let's see an example:

1
2
3
4
5
6
7
8
var fs = require('fs');
var mmd = require('musicmetadata');

var parser = mmd( fs.createReadStream('FreeSWSong.ogg') );

parser.on('metadata',function(res) {
    console.log(res);
});

This would log something like:

1
2
3
4
5
6
7
8
9
10
{ title: 'Free Software Song',
  artist: [ 'Mark Forry, Yvette Osborne, Ron Fox, Steve Finney, Bill Cope, Kip McAtee, Ernie Provencher, Dan Auvil' ],
  albumartist: [],
  album: '',
  year: '2009',
  track: { no: 0, of: 0 },
  genre: [ 'Ethnic' ],
  disk: { no: 0, of: 0 },
  picture: [],
  duration: 0 }

Now, we could also listen for an event for a particular entinty of the meta data or custom metadata types that are not part of the standard metadata.

1
2
3
parser.on('artist', function(res){
  console.log(res);
});

Would log something like : [ 'Mark Forry, Yvette Osborne, Ron Fox, Steve Finney, Bill Cope, Kip McAtee, Ernie Provencher, Dan Auvil' ]

A done event is triggered once the parsing is done, we could as well listen for it, to detect any errors.

GIF FTW!

music-meta-data

Degenerator

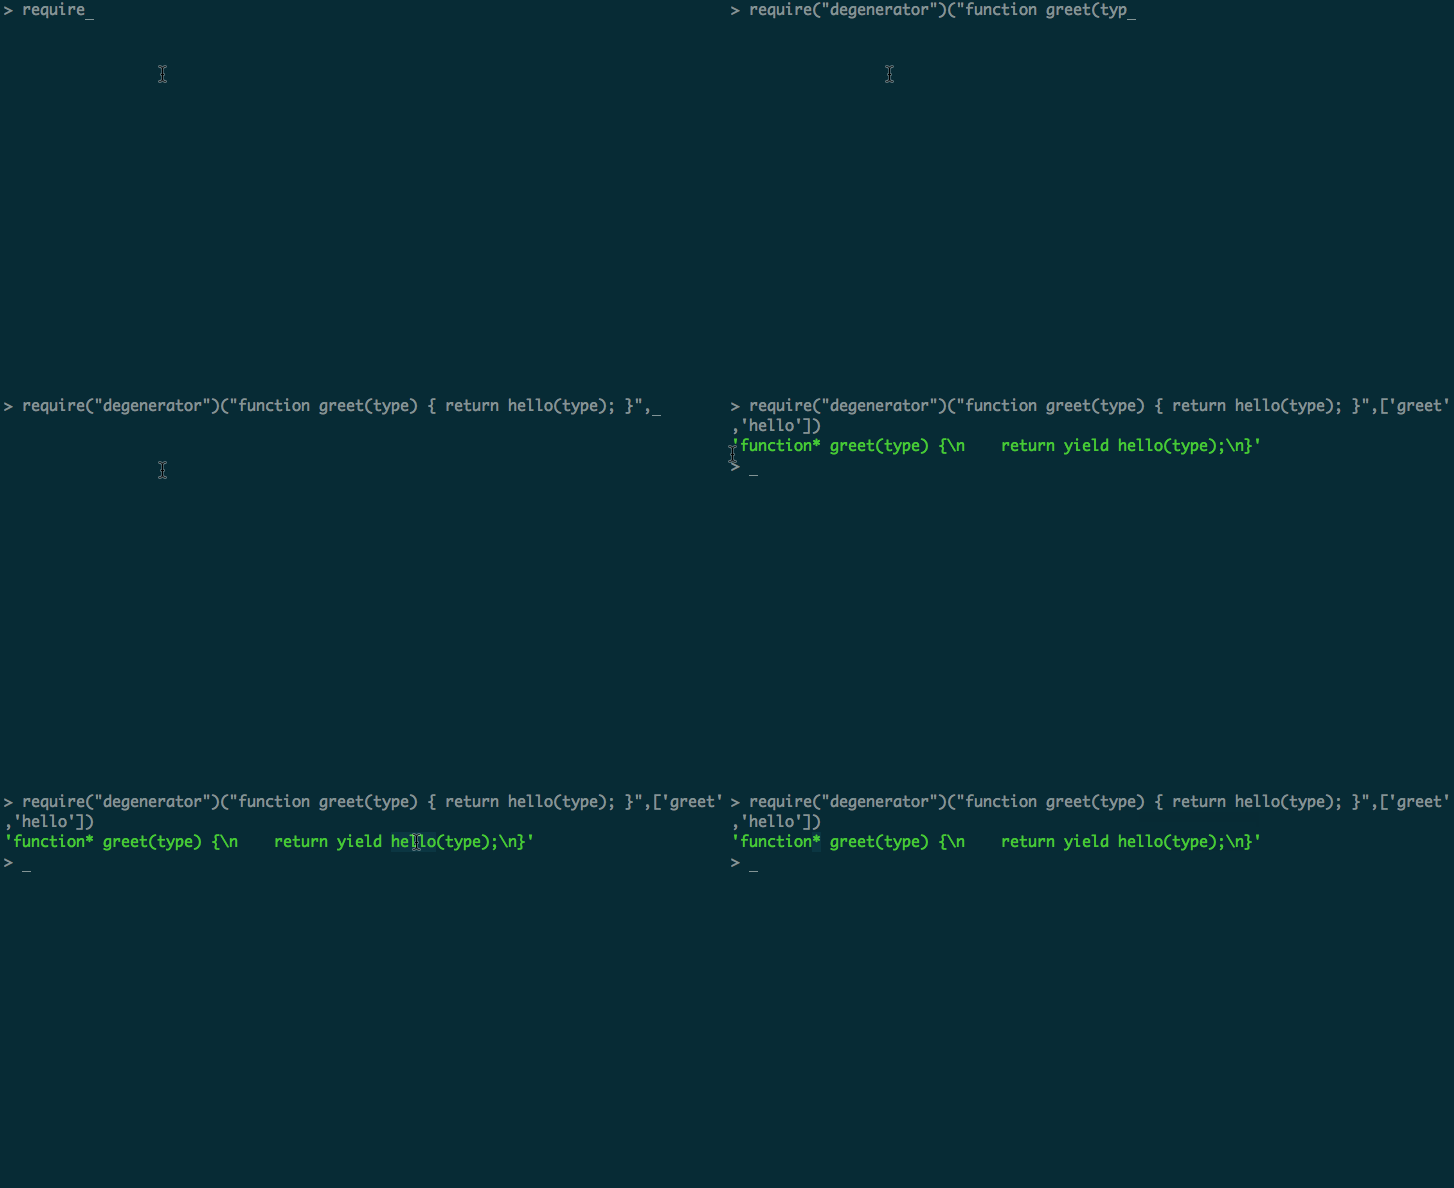
Turns sync functions into ES6's async generator functions with Nathan Rajlich's (A.K.A TooTallNate) degenerator

Get it: $ npm install degenerator

Example Usage:

Say we have few sync function like:

1
2
3
4
5
6
7
8
9
10
11
function foo () {
  return baz();
}

function bar () {
  return foo(baz);
}

function baz () {
  return bar();
}

Some degenerator magic!

1
2
3
var degenerator = require('degenerator')
var js = fs.readFileSync(sourceName, 'utf8');
var compiled = (js, ['foo','bar','baz']);

The complied source would be:

1
2
3
4
5
6
7
8
9
function* foo() {
    return yield baz();
}
function* bar() {
    return yield foo(baz);
}
function* baz() {
    return yield bar();
}

GIF FTW!

degnerator

Time-require

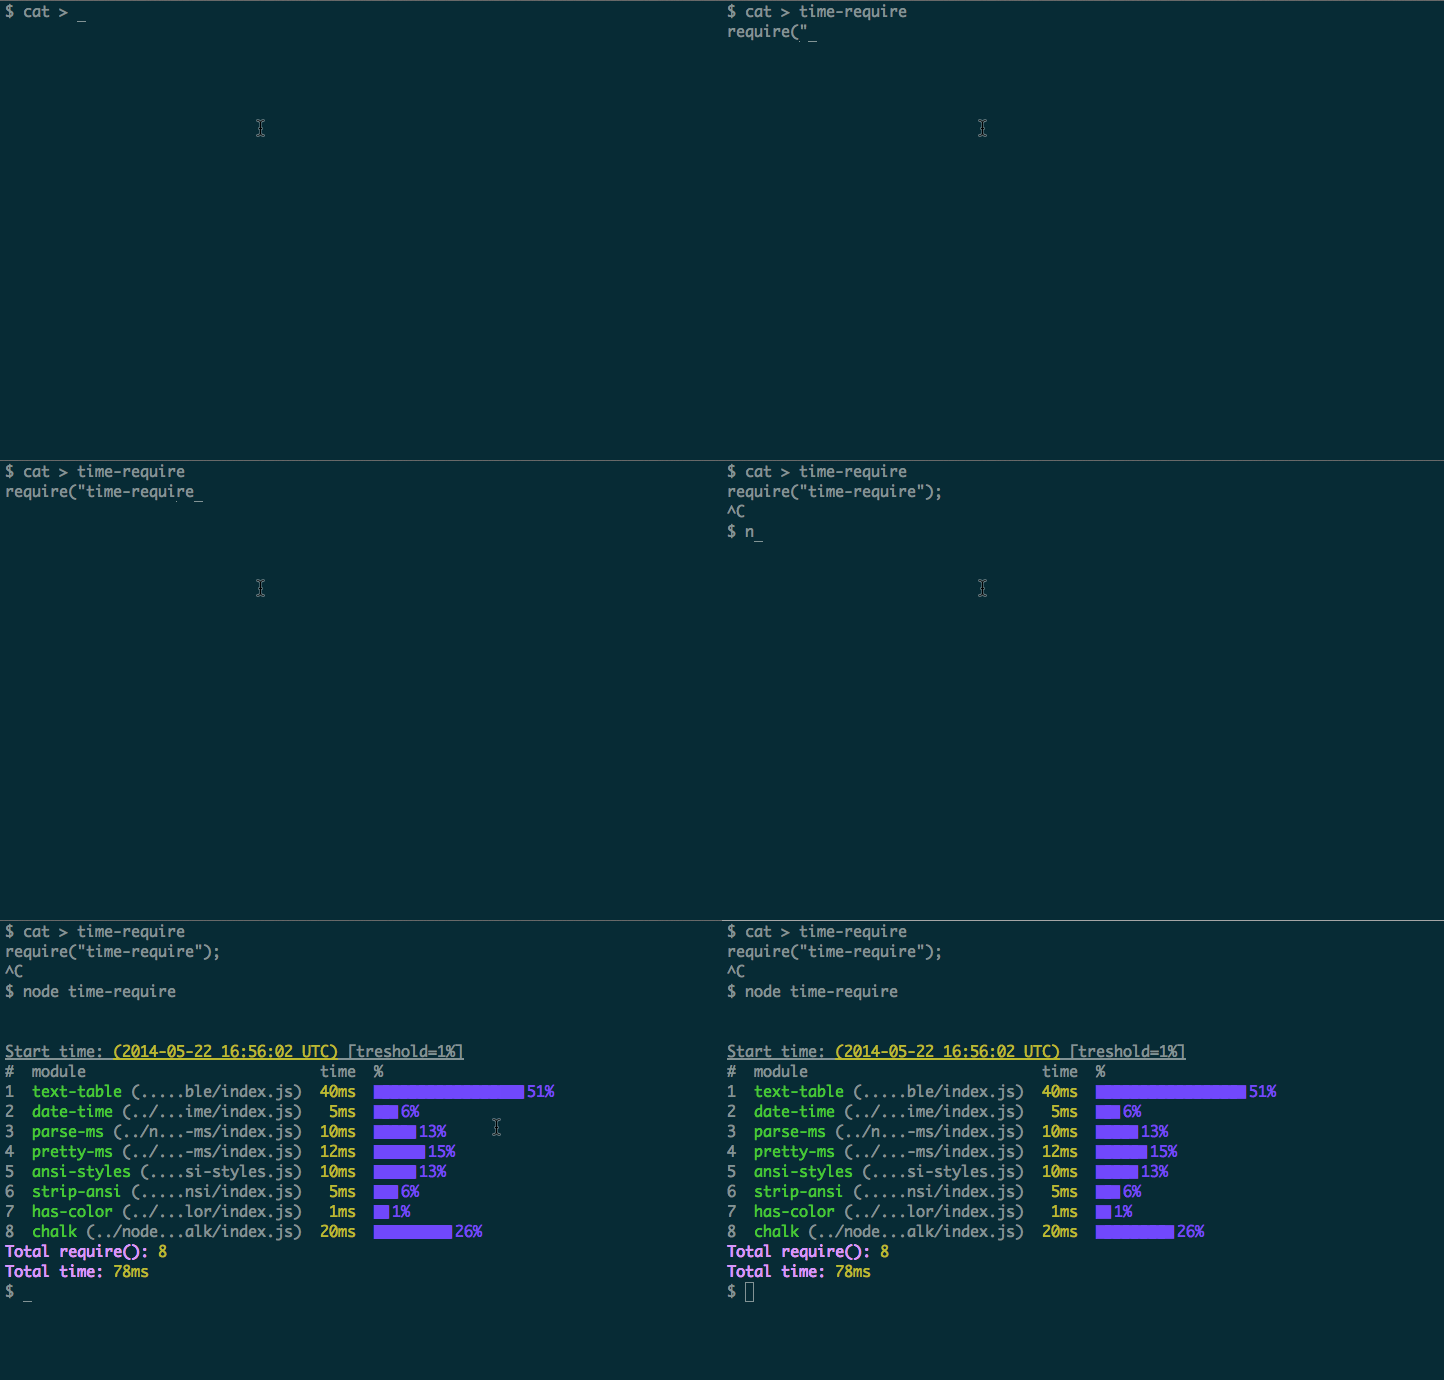
Were you looking for the stats of how long the require statements took in your scripts?

It's time to use (time-require)[https://www.npmjs.org/package/time-require] a node module that displays the execution time for Node.js modules loading by hooking and tracing all require() calls.

Example Usage:

1
2
3
4
5
6
7
8
9
10
11
12
13
14
15
16
17
18
19
$ cat > time-require
require("time-require");
^C

$ node time-require


Start time: (2014-05-22 16:56:02 UTC) [treshold=1%]
#  module                          time  %
1  text-table (.....ble/index.js)  40ms  ▇▇▇▇▇▇▇▇▇▇▇▇▇▇▇▇ 51%
2  date-time (../...ime/index.js)   5ms  ▇▇ 6%
3  parse-ms (../n...-ms/index.js)  10ms  ▇▇▇▇ 13%
4  pretty-ms (../...-ms/index.js)  12ms  ▇▇▇▇▇ 15%
5  ansi-styles (....si-styles.js)  10ms  ▇▇▇▇ 13%
6  strip-ansi (.....nsi/index.js)   5ms  ▇▇ 6%
7  has-color (../...lor/index.js)   1ms  ▇ 1%
8  chalk (../node...alk/index.js)  20ms  ▇▇▇▇▇▇▇▇ 26%
Total require(): 8
Total time: 78ms

This module makes use of a require (hook)[https://github.com/jaguard/time-require/blob/master/src/requireHook.js#L71] which is loaded as the first module so all the other requires gets counted, unhooks and then prints out a neat table with the totalTime = Date.now() - startTime.getTime(); and the number of modules that were required.

Thanks to the module author Ciprian Popa

GIF FTW!

time-require

Yosay

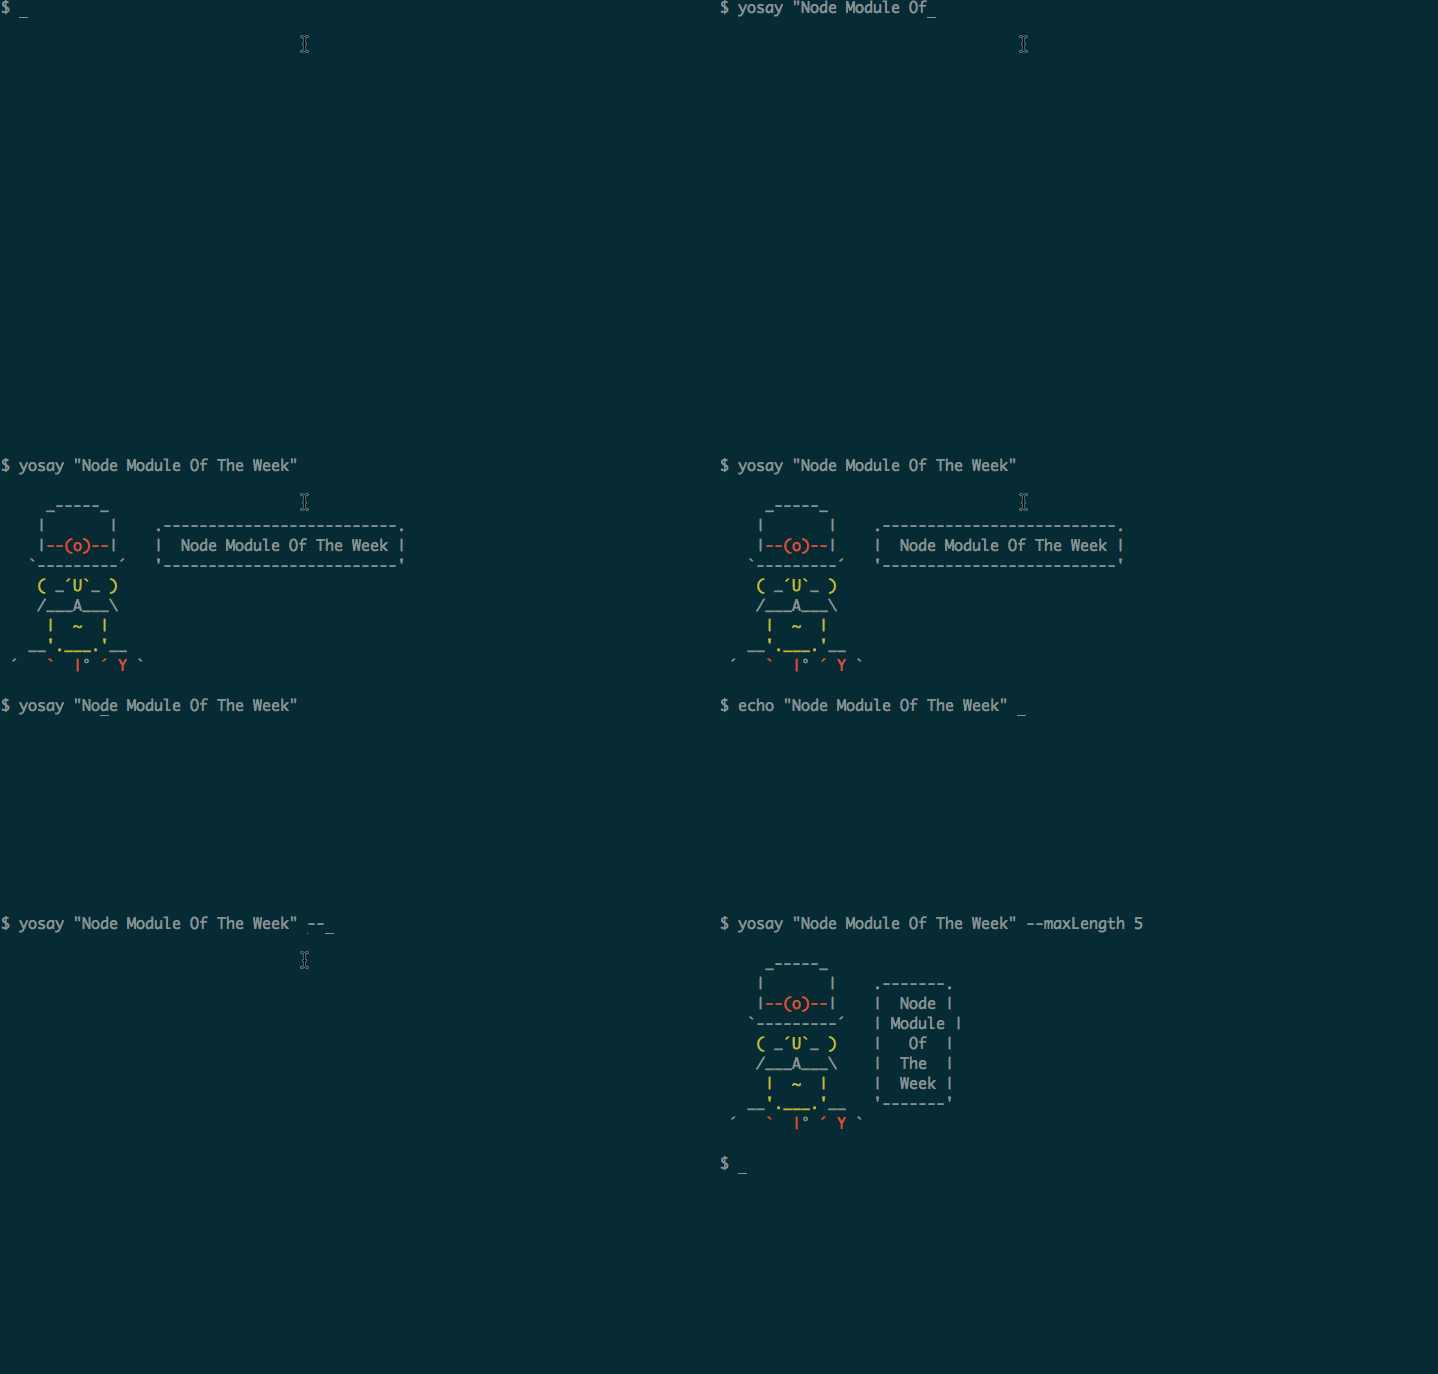
Many of us wanted to greet like Yeoman in the CLI, now it's very easy to do that!

Here is yosay just like cowsay, but less cow. Tell yeoman what to say or talk like yeoman!

Get yosay like an other node module: npm install -g yosay

Example usage:

1
2
3
4
5
6
7
8
9
10
11
12

$ echo "Yo! Mama. You can pipe." | yosay

     _-----_
    |       |    .--------------------------.
    |--(o)--|    |  Yo! Mama. You can pipe. |
   `---------´   '--------------------------'
    ( _´U`_ )    
    /___A___\    
     |  ~  |     
   __'.___.'__   
 ´   `  |° ´ Y ` 
1
2
3
4
5
6
7
8
9
10
11
$ yosay "Node module of the week"

     _-----_
    |       |    .--------------------------.
    |--(o)--|    |  Node module of the week |
   `---------´   '--------------------------'
    ( _´U`_ )
    /___A___\ 
     |  ~  |
   __'.___.'__
 ´   `  |° ´ Y `
1
2
3
4
5
6
7
8
9
10
11
$ yosay "Yo! How's it going" --maxLength 4

     _-----_
    |       |    .------.
    |--(o)--|    |  Yo! |
   `---------´   | How's |
    ( _´U`_ )    |  it  |
    /___A___\    | going |
     |  ~  |     '------'
   __'.___.'__
 ´   `  |° ´ Y `

If you want to use it in you node script, you could do:

1
2
3
4
5
6
7
8
9
10
11
12
13
 var yosay = require('yosay');

 console.log( yosay("Hope you enjoyed the session :)") );

      _-----_
    |       |    .--------------------------.
    |--(o)--|    |   Hope you enjoyed the   |
   `---------´   |        session :)        |
    ( _´U`_ )    '--------------------------'
    /___A___\ 
     |  ~  |
   __'.___.'__
 ´   `  |° ´ Y `

GIF FTW!:

yosay

Enjoy talking like the Yeoman! :)